Risk Level: Medium
Description
This plugin guarantees that performance diagnostics is enabled on virtual machines. The performance diagnostics instrument helps in investigating or troubleshooting execution gives that can influence a Windows or Linux virtual machine (VM).
About the Service
Azure Virtual Machine:
Azure Virtual Machines (VM) is one of several forms of scalable, on-demand computing resources offered by Azure. VMs are typically used when you require more control over the computing environment than the other options provide. This article explains what you should think about before creating a virtual machine, how to construct one, and how to administer one. For more information, click here.
Impact
When empowered, the Performance Diagnostics element can help you find and investigate execution-related issues that can influence your Windows or Linux virtual machines (VMs). Upheld investigating situations remember fast checks for known issues and best practices, and complex issues that include slow VM execution or high use of CPU, memory, or plate space.
Steps to Reproduce
In order to determine, if Performance Diagnostics is enabled for the selected Azure Virtual Machine, follow the steps given below:
Using Azure Console-
- Firstly, sign in to the Azure Management Console with your registered organization email address.
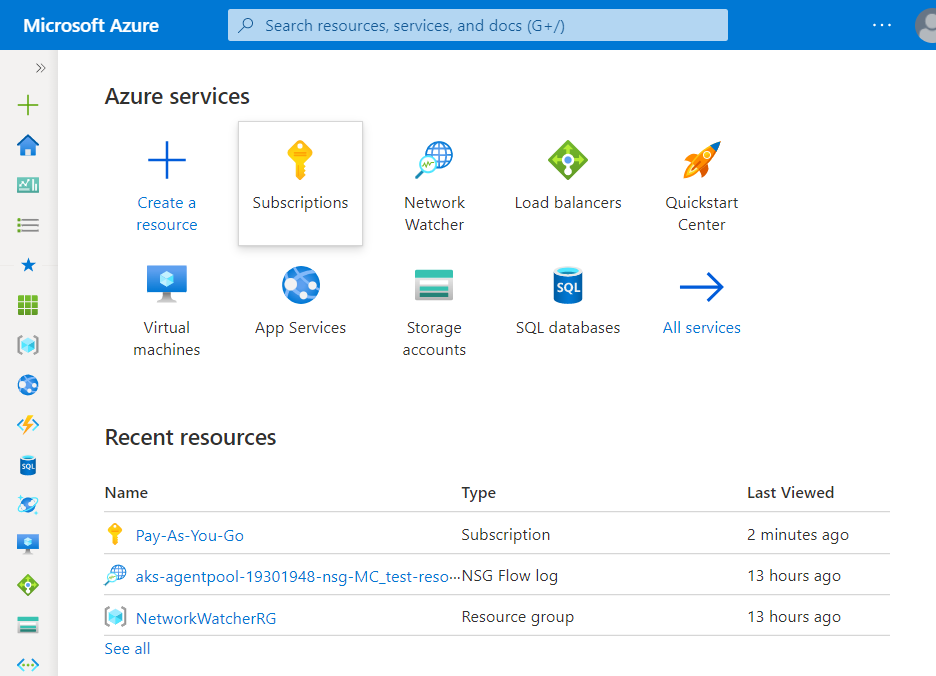
- Under Azure Services, choose Subscriptions.
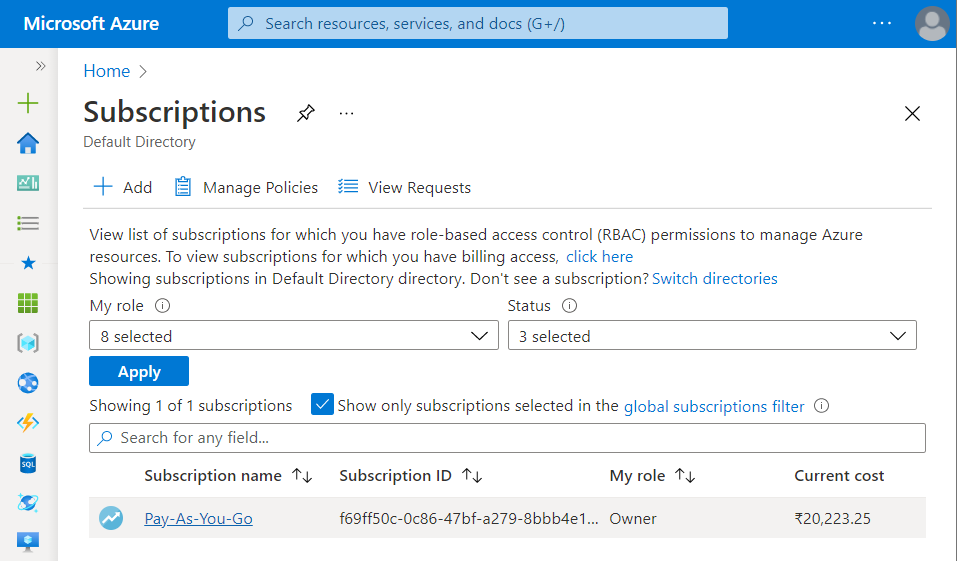
- A new Subscription page will be opened up. Choose the subscription for which the issue has to be examined.
- Now, in the Filter Type Box, search for Virtual Machines.
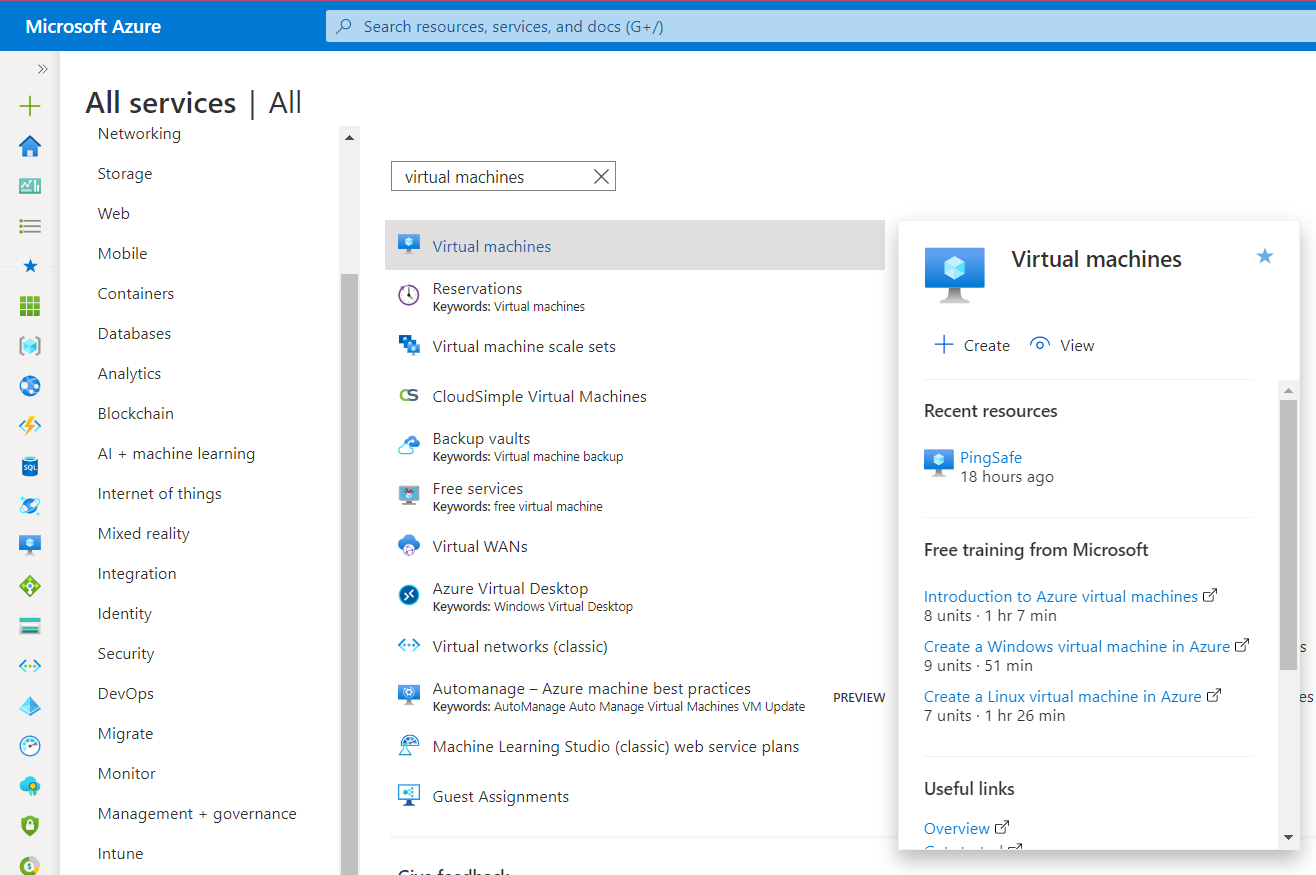
- Click on the Virtual Machines nav link. A list of all the virtual machines (VMs) in your selected subscription will be displayed on the screen.
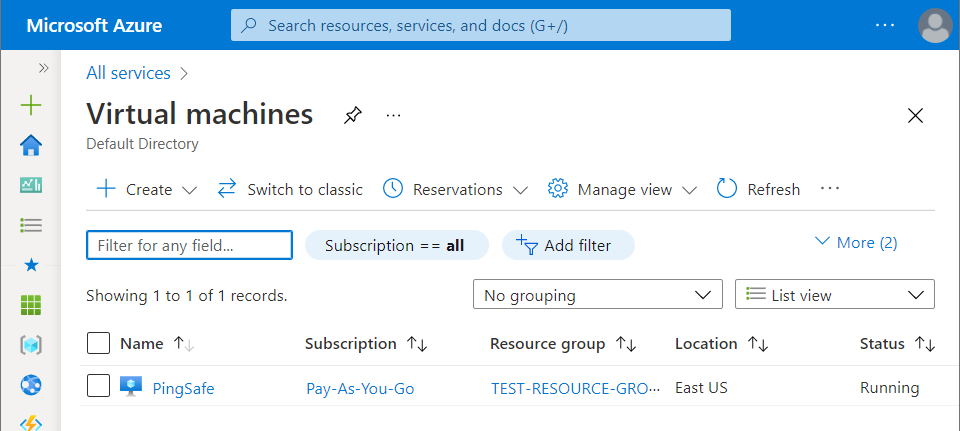
- Click on the Name of the Virtual Machine, for which you want to examine.
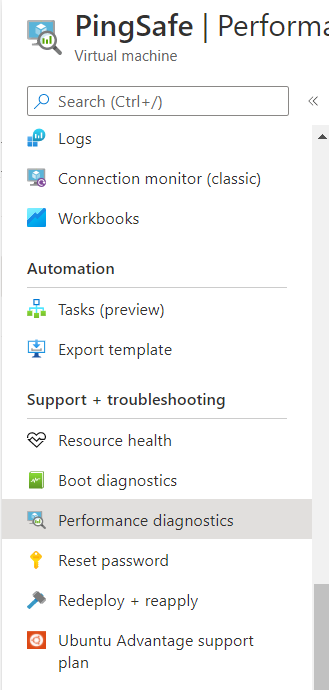
- A detailed view of your selected virtual machine will be displayed. Now, in the navigation panel, under the Help, click on the Performance Diagnostics blade.
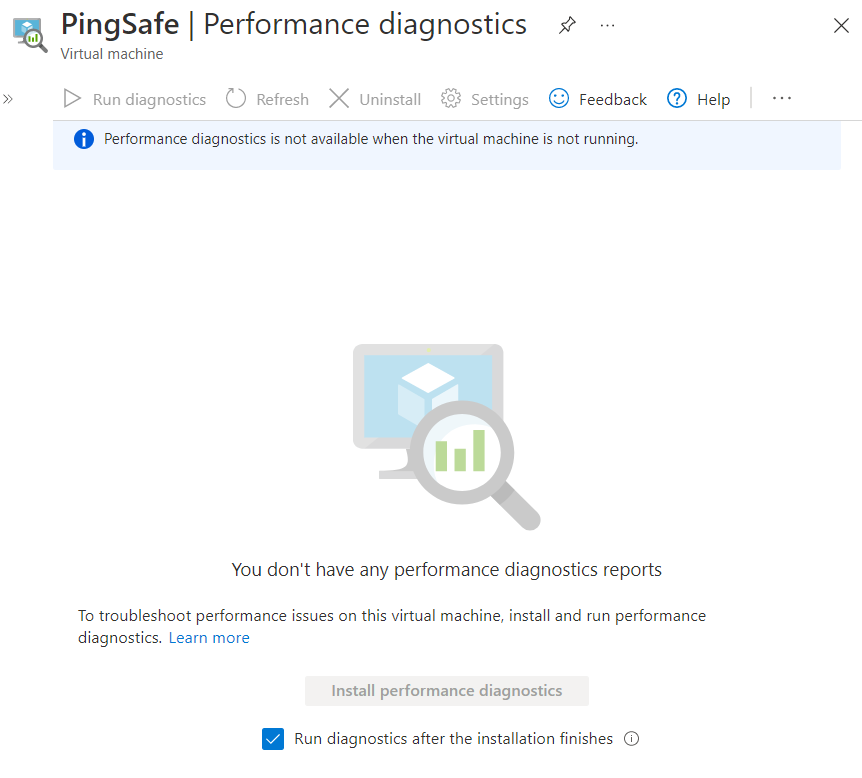
- A Performance Diagnostics Page will appear on the screen. If it shows as “You don’t have any performance diagnostics reports. To troubleshoot performance issues on this virtual machine, install and run performance diagnostics.” then the Performance Diagnostics feature is not enabled for the selected virtual machines in your current Azure Cloud.
- Follow the steps above, for other Azure Virtual Machines (VMs) in the current subscription as well as in other subscriptions in your Azure Cloud.
Steps for Remediation
In order to change the configurations to enable the Performance Diagnostics self-help tool, in the selected VM for your Azure cloud account, follow the steps given below:
Using Azure Console-
- Firstly, sign in to the Azure Management Console with your registered organization email address.
- Under Azure Services, choose Subscriptions.

- A new Subscription page will be opened up. Choose the subscription for which the issue has to be examined.

- Now, in the Filter Type Box, search for Virtual Machines.

- Click on the Virtual Machines nav link. A list of all the virtual machines (VMs) in your selected subscription will be displayed on the screen.

- Click on the Name of the Virtual Machine, for which you want to examine.
- A detailed view of your selected virtual machine will be displayed. Now, in the navigation panel, under the Support + Troubleshooting, click on the Performance Diagnostics blade.

- A Performance Diagnostics Page will appear on the screen.
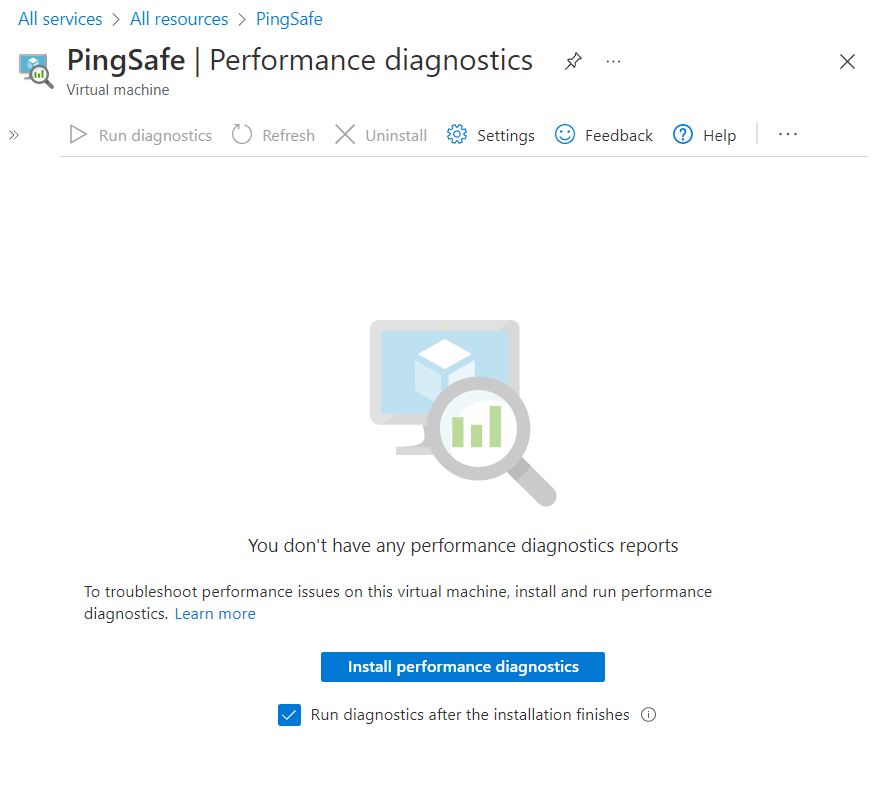
- Click on the Install Performance Diagnostics button. A Run diagnostics dialog box, select Performance analysis option in the analysis dropdown list. (Even, you may choose the analysis option according to your preference.)

- Check the checkbox which says, I acknowledge that I am getting this software from Microsoft Corp. and that I have read and agree to the legal terms and privacy policy.
- You may check the checkbox next to, I agree to share diagnostics information with Microsoft. However, this is completely optional.
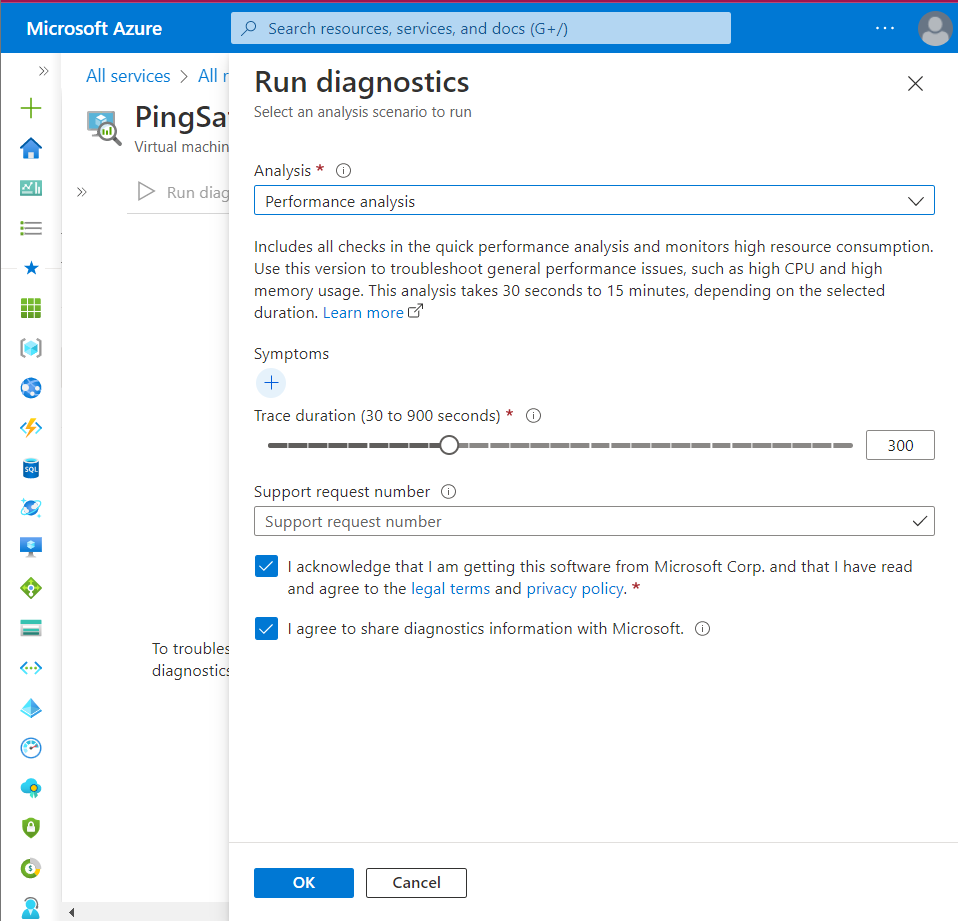
- Now, click OK button to confirm the performance analysis and continue.

- The analysis will take approximately 30 seconds to 15 minutes for completion. All the performance insights and related information gathered during analysis is uploaded to a storage account, then the performance diagnostics report is generated and listed on the Azure Management Console.
- On the performance diagnostics page, you may now go under the Diagnostic reports, and click on the freshly generated report of performance diagnostics and then review the lists of insights and recommendations for your selected Virtual Machine.
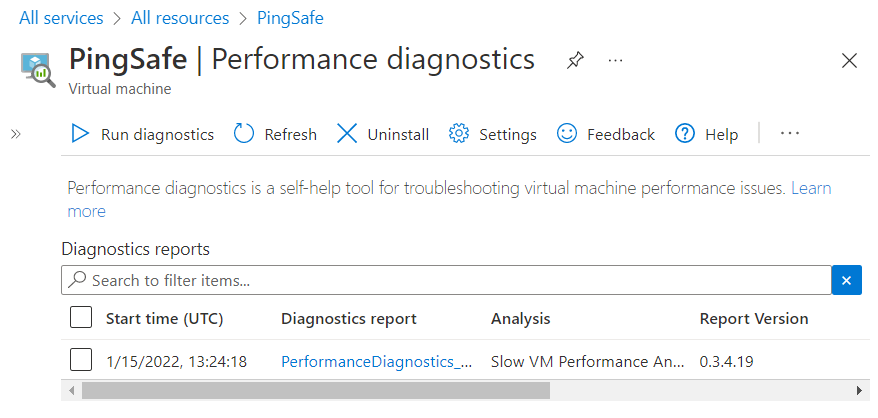
- You may download the report, delete it, etc. according to your preference.
- Follow the steps above, for other Azure Virtual Machines (VMs) in the current subscription as well as in other subscriptions in your Azure Cloud.
