Risk Level: Medium
Description
This plugin guarantees that the Azure assets or resources labelled as locked are really locked. Empowering Management Locks guarantees that basic assets can't be accidentally changed or erased.
Configuration Parameters
Management Lock Tag: This parameter specifies the tags that if present for a resource, should be locked. An alert will be generated if resources with these tags are not locked.
By default, the value is set to null, so it will not show any vulnerability.
About the Service
Azure Resources:
Azure Resources Groups are logical collections of virtual machines, storage accounts, virtual networks, web apps, databases, and/or database servers. Organizations can use subscriptions to manage costs and the resources that are created by users, teams, or projects. A subscription is essentially a billing unit. For more information, click here.
Impact
Resources created on the Azure platform need to be secured as they tend to be critical. Enabling Management Locks ensures that critical resources cannot be inadvertently modified or deleted. Thus, the plugin ensures that resources tagged as locked are actually locked. Enabling Management Locks ensures that critical resources cannot be inadvertently modified or deleted.
Steps to Reproduce
In order to determine, if the Azure Resources tagged as locked are actually locked, follow the steps given below:
Using Azure Console-
- Firstly, sign in to the Azure Management Console with your registered organization email address.
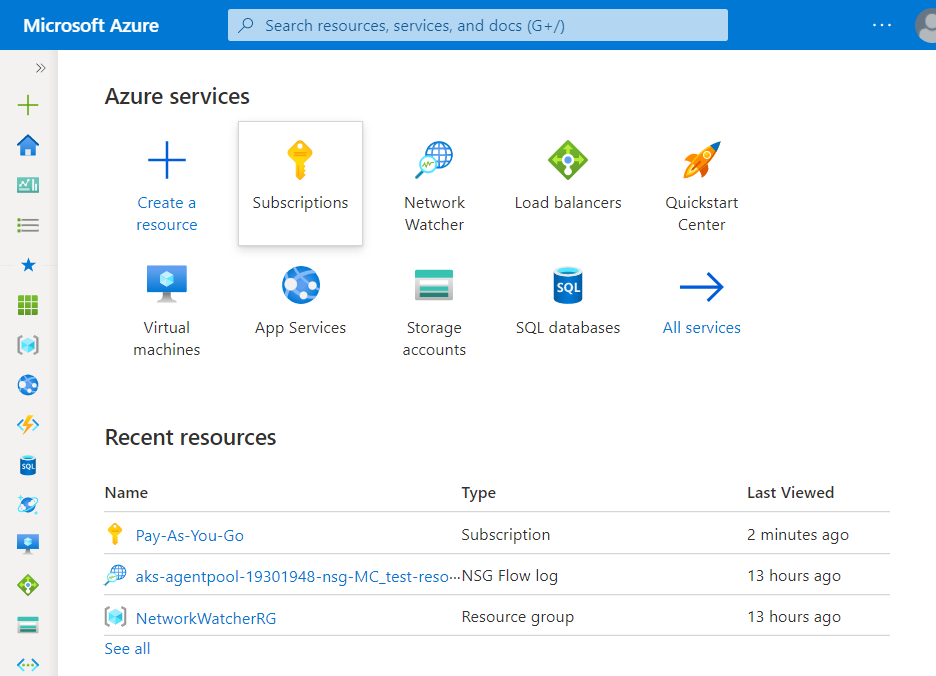
- Under Azure Services, choose Subscriptions.
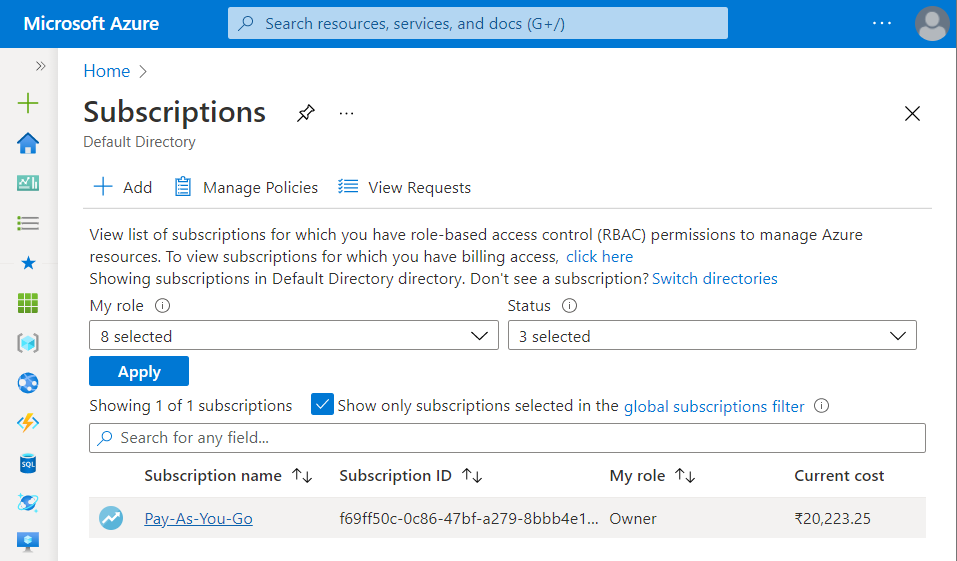
- A new Subscription page will be opened up. Choose the subscription for which the issue has to be examined.
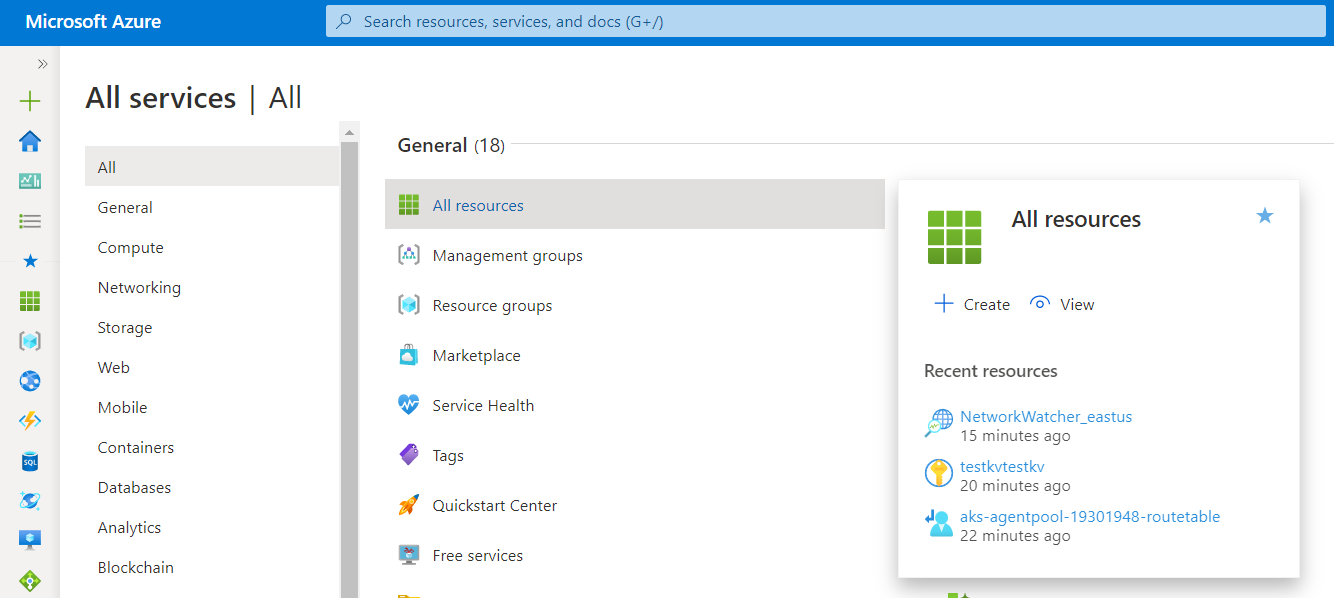
- Now, under All Services option, select All Resources nav link.
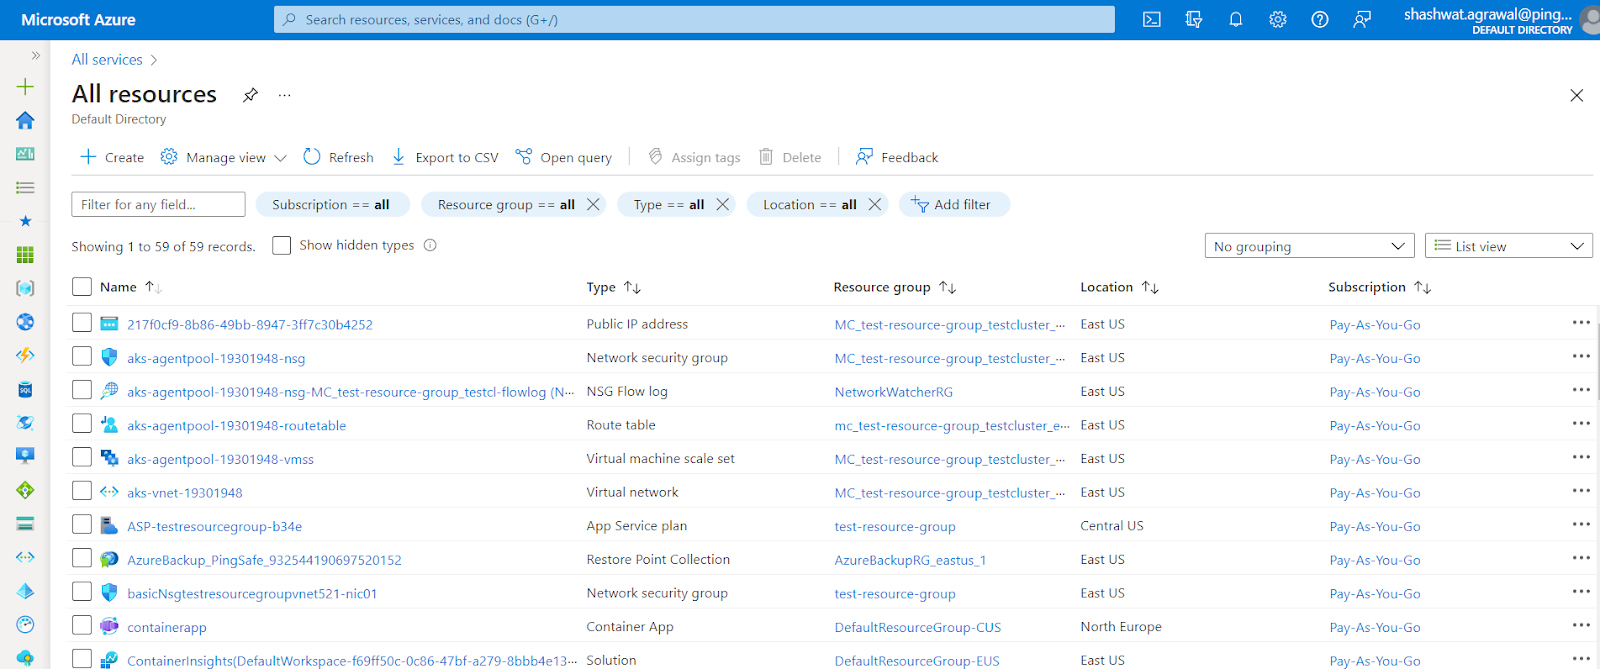
- A list of all the Azure Resources will be shown up. Select the resource you want to examine.
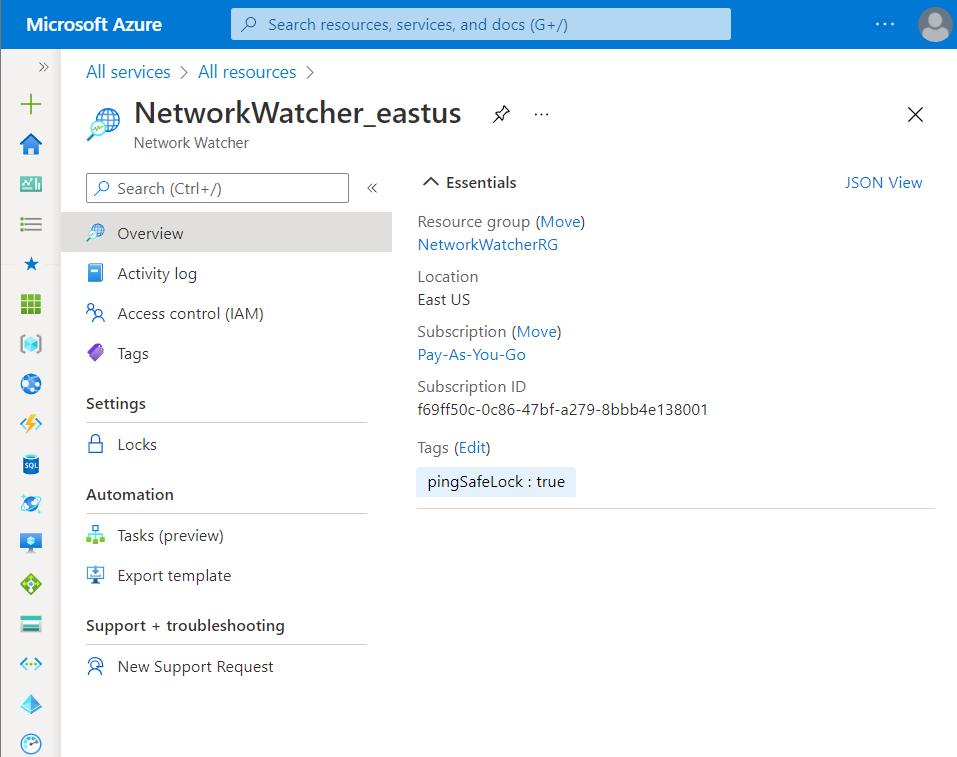
- In the Resource page, click on the Overview blade, present at the left navigation panel. Then check if any tag is present stating lock as True. In this case, pingSafeLock: true.
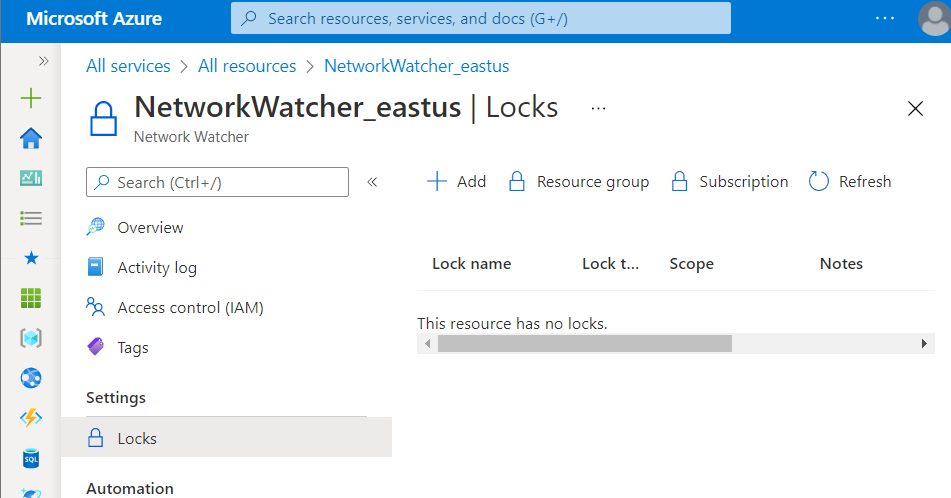
- Now, navigate to the Locks blade present at the left navigation panel. Check if any Lock is available. If it shows This resource has no locks, this means that the selected resources which were tagged as locked is not actually locked.
- Follow the steps above, for other Azure Resources in the current subscription as well as in other subscriptions in your Azure Cloud.
Steps for Remediation
In order to reconfigure Azure Resources to enable Locks, follow the steps given below:
Using Azure Console-
- Firstly, sign in to the Azure Management Console with your registered organization email address.
- Under Azure Services, choose Subscriptions.

- A new Subscription page will be opened up. Choose the subscription for which the issue has to be examined.

- Now, under All Services option, select All Resources nav link.

- A list of all the Azure Resources will be shown up. Select the resource you want to examine.

- In the Resource page, click on the Overview blade, present at the left navigation panel. Then check if any tag is present stating lock as True. In this case, pingSafeLock: true.

- Now, navigate to the Locks blade present at the left navigation panel. Check if any Lock is available. If it shows This resource has no locks, this means that the selected resources which was tagged as locked is not actually locked.

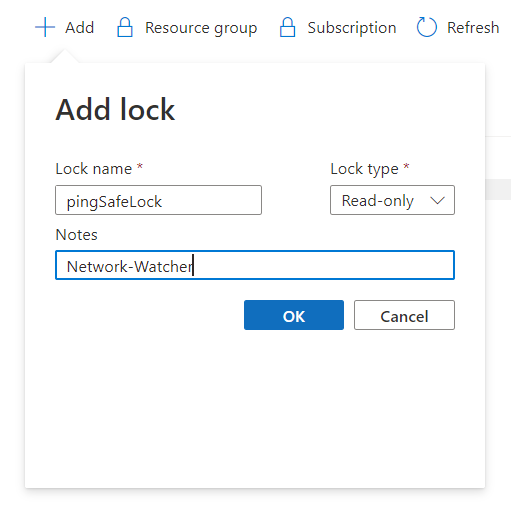
- Click on the +Add option present at the top navigation bar. Fill the asked details, Lock Name, Lock Type and Notes. Click on the OK button to add the created lock.
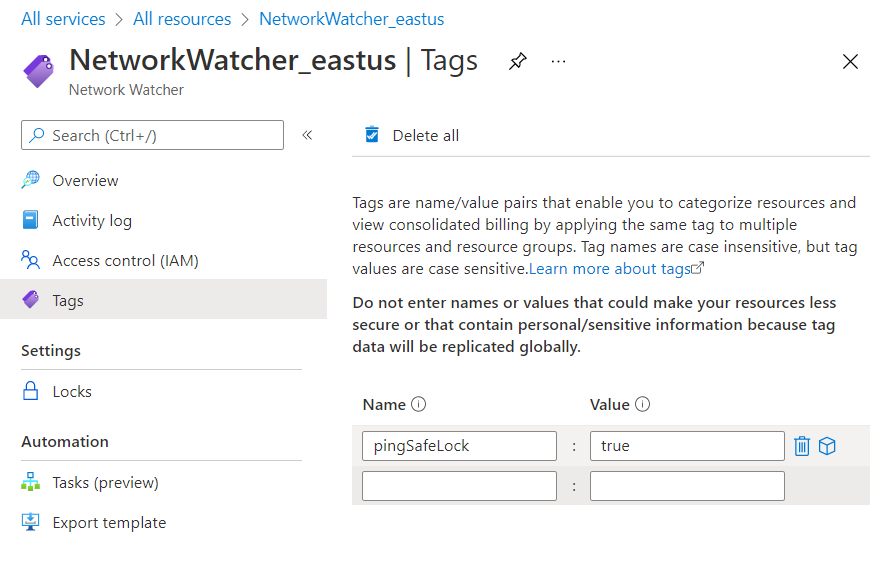
- Now, navigate to the Tags blade, and add pingSafeLock as a tag with True as its value.
- Note: The tag name can be set by the user under the Dashboard, for the current usage, pingSafeLock has been used as a Tag.
- Now, click on the Apply button to save your current settings.

- Follow the steps above, for other Azure resources in the current subscription as well as in other subscriptions in your Azure Cloud.
