Risk Level: Medium
Description
This plugin ensures that preemptible VM instances aren't used for mission-critical or production workloads. Preemptible VM instances are instances that are accessible at a significantly cheaper price than the general pricing, but they may be terminated at any time if the resources are required for other tasks. These instances are useful for operations like batch processing, but they are extremely dangerous to utilize in production.
About the Service
Google Cloud Compute Engine:
Google Cloud Compute Engine is a service that allows you to create Virtual Machines based on your preferences and run them on Google’s infrastructure. You can either use their predefined machines with certain default configurations or create your own custom Virtual Machine to meet your exact requirements. To know more, read here.
Impact
Preemptible VM instances come with a lot of risks when not used correctly. Compute Engine might stop preemptible instances at any time due to system events, and are always stopped after they run for 24 hours. Preemptible instances also cannot be enabled to automatically restart in the event of a maintenance event or live migrate to a regular VM instance. Moreover, because they are excess Compute Engine capacity, these instances might not always be available.
Steps to Reproduce
Using GCP Console-
- Log In to your GCP Console.
- From the top navigation bar, select the GCP project you want to investigate.

- From the navigation panel on the left side of the console, go to Compute Engine and select VM Instances. You can use this link here to navigate directly if you’re already logged in.

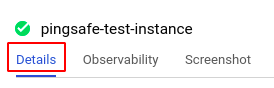
- Select the VM instance you want to investigate from the list of instances and go to the Details tab to examine the details of the VM instance selected.

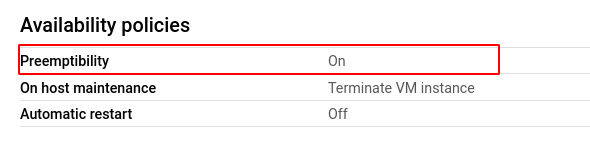
- Scroll down to the Availability policies section and under Management and check the setting of Preemptibility. If it is set to On then this means that the selected instance is preemptible.
- Repeat steps 4 and 5 for all the VM instances you want to investigate in the selected project.
- If you have multiple projects that you want to investigate, repeat steps 2-6 for each project in your GCP console.
Steps for Remediation
Determine whether or not you truly wish to use preemptible VM instances. If not, make the necessary changes using the steps given below.
Note: In order to disable preemptibility on your VM instance, you are required to re-create the instance with the required configuration.
Using GCP Console-
- Log In to your GCP Console.
- From the top navigation bar, select the GCP project you want to investigate.
- From the navigation panel on the left side of the console, go to Compute Engine and select VM Instances. You can use this link here to navigate directly if you’re already logged in.
- Select the VM instance you want to recreate from the list of instances and go to the Details tab and note down the necessary details of the VM instance selected.
- Go back to the VM Instances page and click on the CREATE INSTANCE option to recreate the instance.
- In the Create an instance page, after filling in your desired name for the VM instance, do the following steps to enable CSEK configuration:
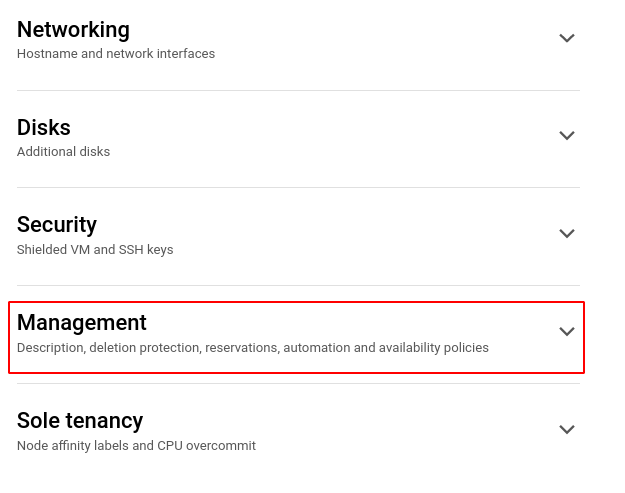
- Scroll down to the “Networking, disks, security, management, sole-tenancy” section and expand the section.

- Click on the Management option to access the availability policies settings.
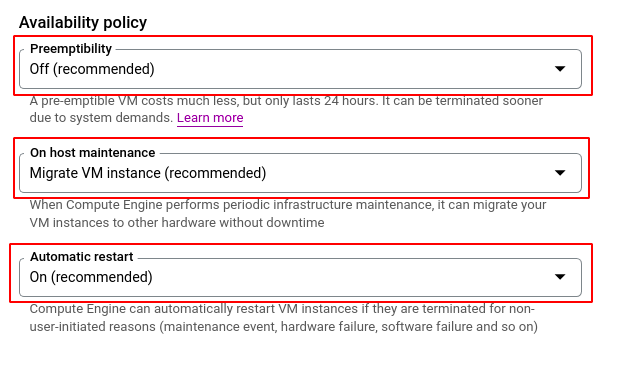
- In the Availability policy section, set the configurations as shown in the screenshot below.
- Configure all other details in your VM instance based on the details you noted down of the original VM instance and then click create to create your new VM instance.
- Migrate all the data from the original VM instance to your newly created VM instance that is CSEK encrypted.
- You can delete the original instance once all the data has been migrated to the new VM instance. To do so, click on the VM instance and select the delete option from the top navigation bar.

- In the delete VM instance pop-up click on delete to confirm your action.

- Repeat steps 4 to 9 for all the VM instances you want to reconfigure in the selected project.
- If you have multiple projects, repeat steps 2-10 for each project in your GCP console.