This plugin ensures that Amazon Redshift clusters are not using port '5439' (default port) for database access.
Risk Level: MEDIUM
Description:
This plugin ensures that Amazon Redshift clusters are not using port '5439' (default port) for database access. Amazon Redshift clusters should not use the default port for database access to ensure cluster security.
Recommended Action: Update Amazon Redshift cluster endpoint port.
About the Service :
Amazon Redshift is a cloud-based, fully managed petabyte-scale data warehousing service. This allows you to gain fresh insights for your company and customers by analyzing your data. The first step in creating a data warehouse is to set up an Amazon Redshift cluster, which is a collection of machines. You can upload your data set and then run data analysis queries after you've provisioned your cluster. Regardless of the size of the data set, Amazon Redshift provides quick query performance using the same SQL-based tools and business intelligence apps you're already using.
Impact:
To promote port obfuscation as an additional layer of defense against non-targeted attacks, ensure that your AWS Redshift database clusters are not using their default endpoint port (i.e. 5439).
Changing the default port number for Redshift database clusters is a basic security step, but it does not protect the clusters completely against port scanning and network threats. To implement sophisticated Redshift database security, consider limiting public access, regulating cluster access through security groups and Network Access Control Lists (NACLs), and encrypting client connections to database clusters with SSL.
Steps to reproduce :
- Sign in to your AWS management console.
- Navigate to Redshift dashboard at: https://console.aws.amazon.com/redshift/

- Select “ Clusters ” under “ Redshift Dashboard ”.
- Click and select the cluster you want to examine.

- Under the Properties panel, check the Port attribute value. If the port value is “ 5439 ”, the selected Amazon Redshift cluster is not using a non-default port for database access.

- Repeat step 5 to verify the port value for other Redshift clusters available in the current region as well as in different regions.
Steps for remediation :
- Sign in to your AWS management console.
- Navigate to Redshift dashboard at: https://console.aws.amazon.com/redshift/

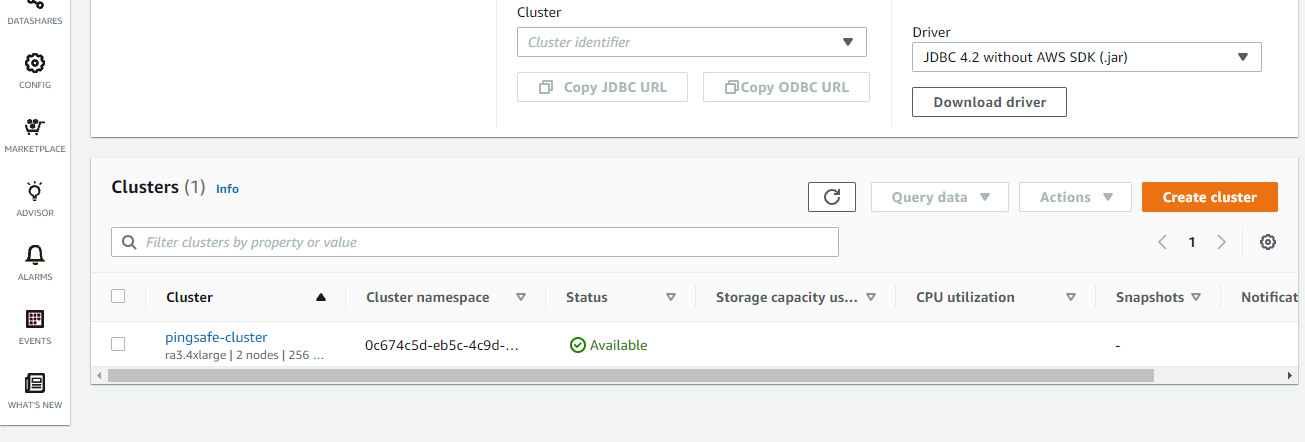
- Select “ Clusters ” under “ Redshift Dashboard ”.
- Click and select the cluster you want to examine.

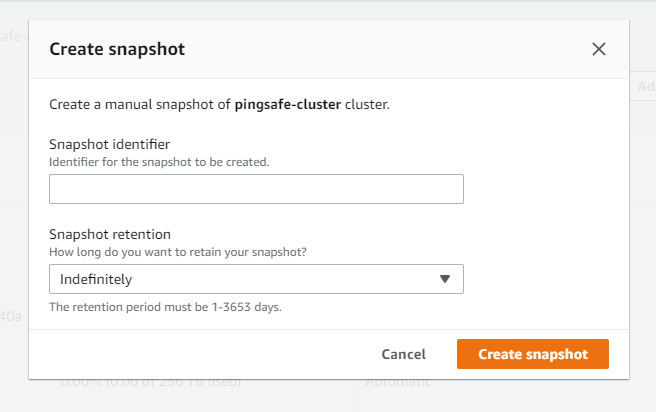
- On the page that appears, under Action dropdown, under Backup and disaster recovery, select Create snapshot.

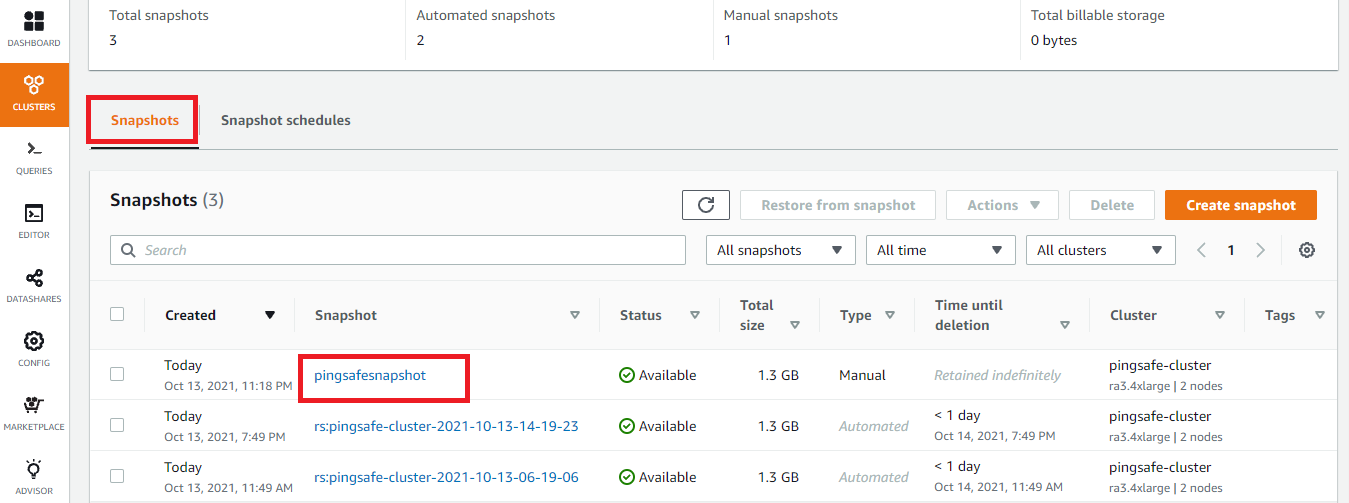
- On the Create Snapshot dialog box, enter a unique name for your database cluster snapshot in the Snapshot Identifier box then click Create to build the snapshot. The process could take several minutes. Once the snapshot is created it will appear on your Redshift Snapshots page.

- In the navigation panel, under Redshift Dashboard, under Clusters, click Snapshots and select the Amazon Redshift cluster snapshot created at step no. 6.

- Select Restore From Snapshot on the top right corner of the panel, and perform the following actions:
- In the Cluster Identifier box, enter a unique name for the new (reconfigured) Redshift cluster.
- Change the default database port number available inside the Port box with a custom port number.
- Configure the rest of the options (Node Type, Cluster Parameter Group, Availability Zone, VPC Security Groups, etc) based on the configuration information taken from the existing database cluster.
- Click Restore to create the new Redshift database cluster
- As soon as the build process is complete, update your application configuration to refer to the new cluster endpoint.
- Once the Redshift cluster endpoint is changed within your application configuration, it’s safe to remove the source (old) Redshift cluster from your AWS account.
- Repeat steps no. 4 - 10 to change the database endpoint port for other AWS Redshift clusters provisioned in the current region as well as in different regions.
References:
