Risk Level: Medium
Description
This plugin guarantees that the Azure virtual machines have no unattached disk volumes. At the point when a virtual machine (VM) in Azure is erased, naturally, any disks that are appended to the VM aren't erased. These disks should be erased to save costs for unused assets and resources.
About the Service
Azure Virtual Machine:
Azure Virtual Machines (VM) is one of several forms of scalable, on-demand computing resources offered by Azure. VMs are typically used when you require more control over the computing environment than the other options provide. This article explains what you should think about before creating a virtual machine, how to construct one, and how to administer one. For more information, click here.
Impact
Each virtual machine plate volume provisioned in your Azure cloud account is putting charges on your month-to-month bill, in any case, whether or not the asset is being utilized. Eliminating unattached/stranded information plate volumes can assist you with staying away from surprising charges on your Azure bill and stop outlandish admittance to any classified information accessible on these volumes.
Steps to Reproduce
In order to determine, if there are any unattached data disk volumes in your Microsoft Azure account, follow the steps given below:
Using Azure Console-
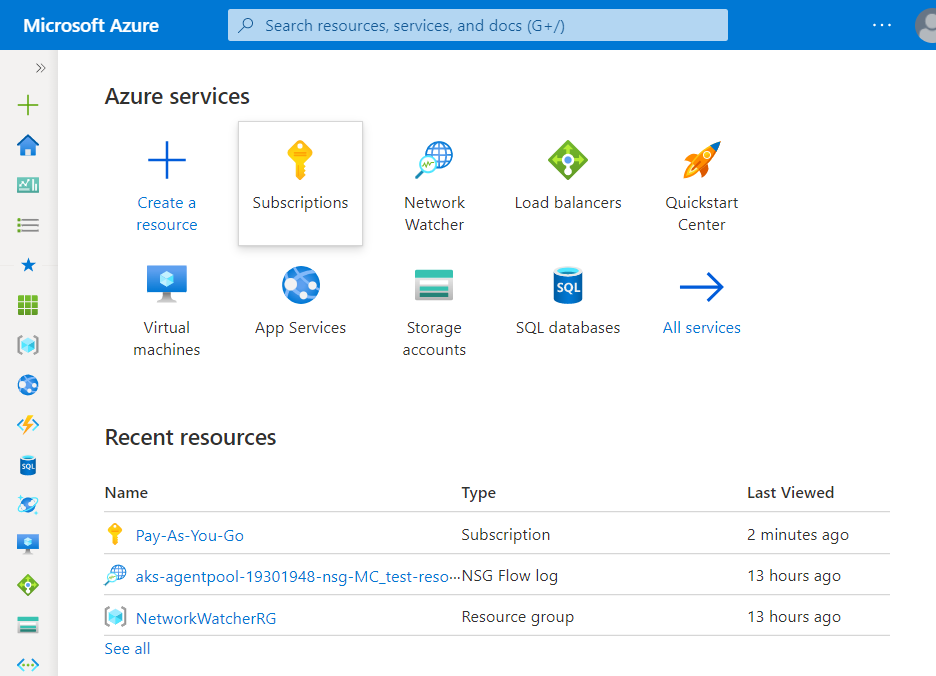
- Firstly, sign in to the Azure Management Console with your registered organization email address.
- Under Azure Services, choose Subscriptions.
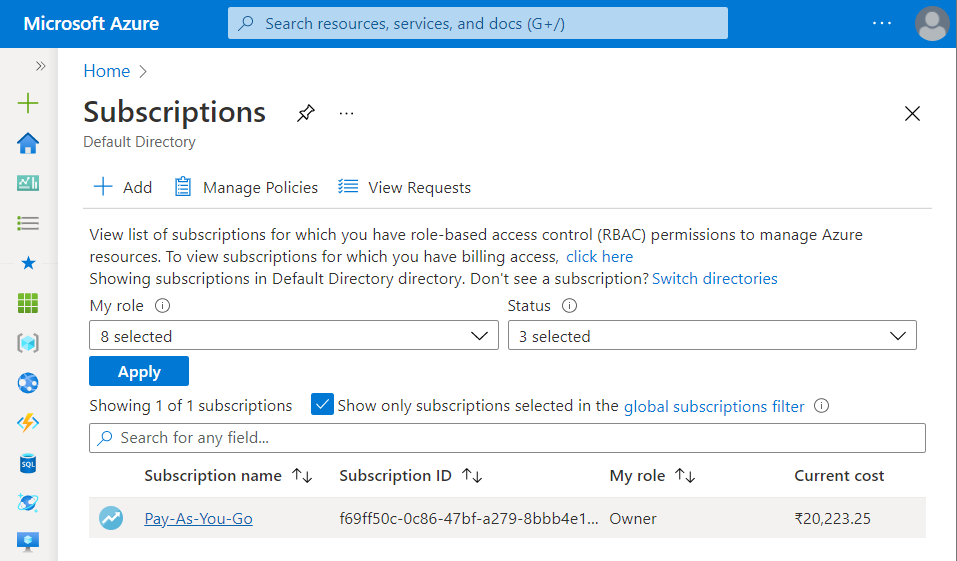
- A new Subscription page will be opened up. Choose the subscription for which the issue has to be examined.
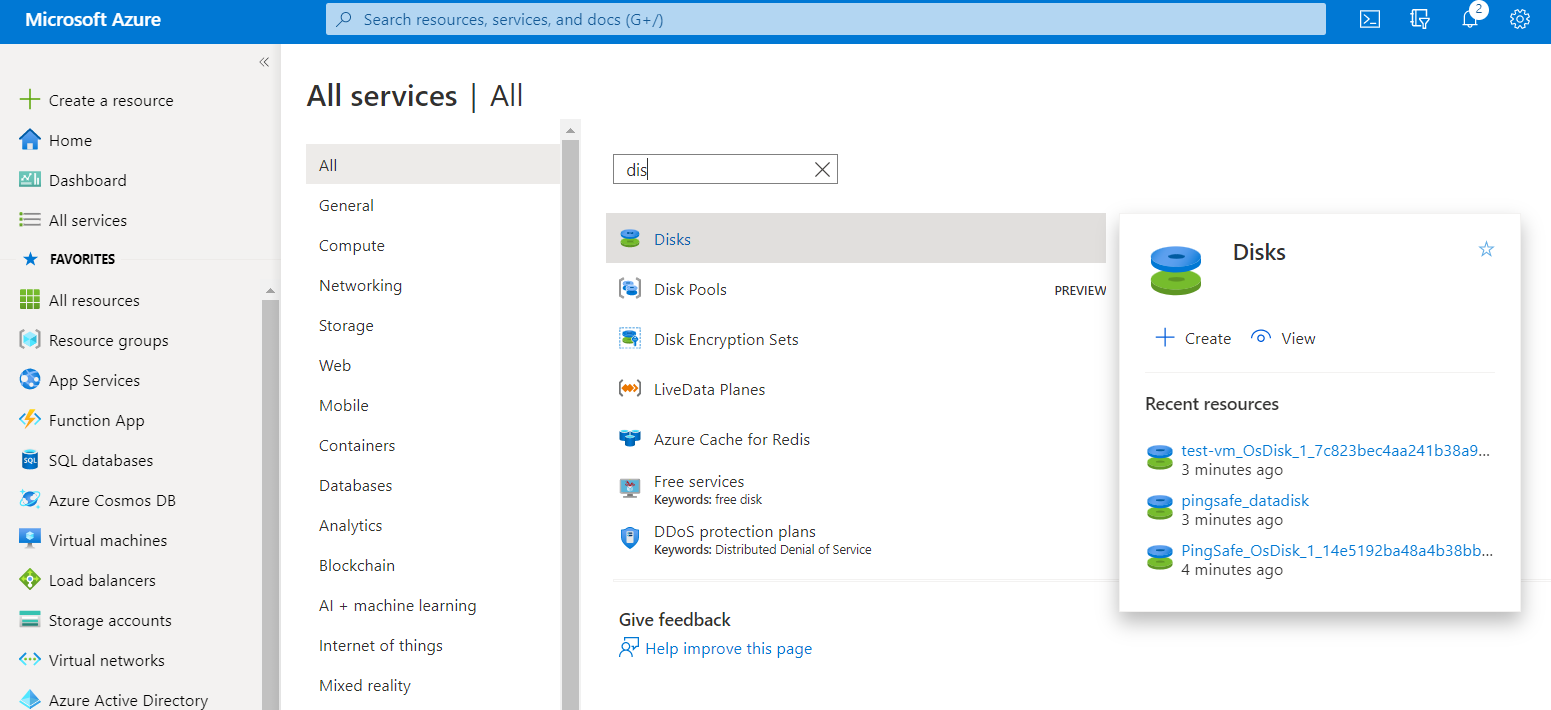
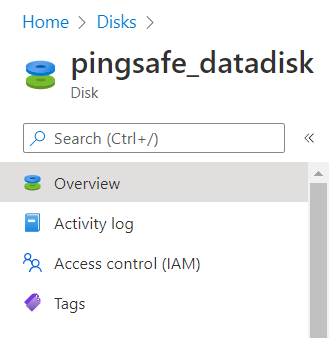
- Now, under All Services click on the Disks services.
- A list of all the virtual machines (VMs) disk volumes in your selected subscription will be displayed on the screen.
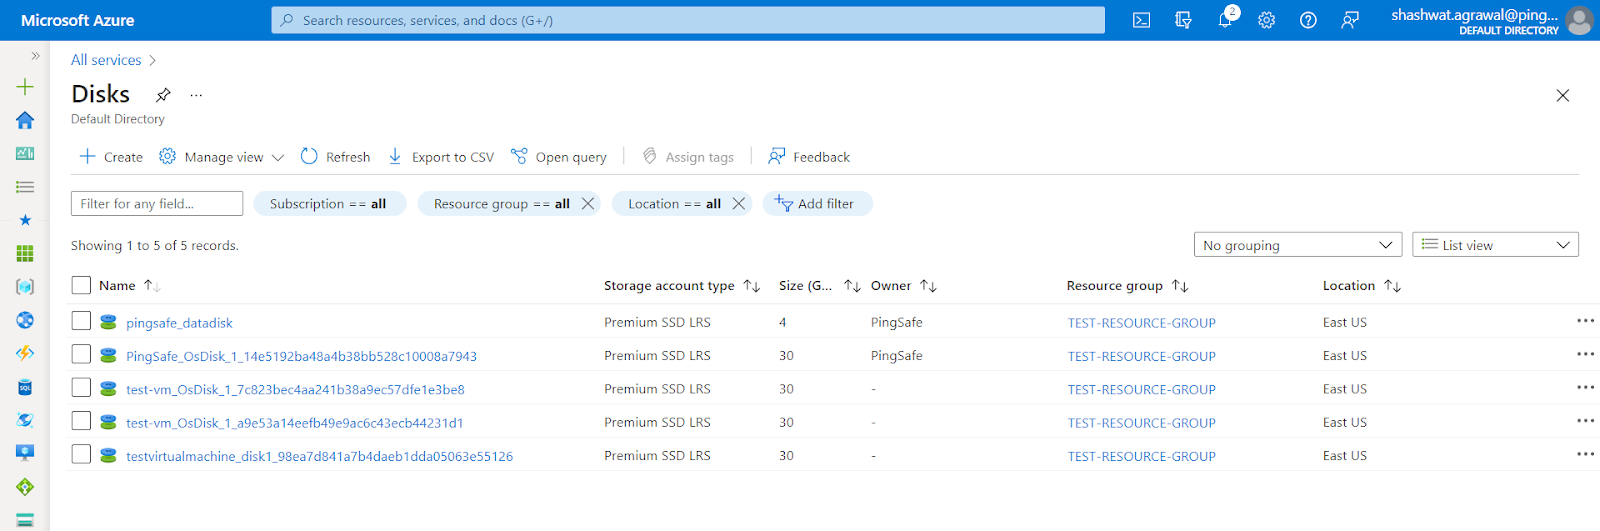
- Click on the name of the VM disk volume that you want to examine.
- In the navigation panel, choose the Overview blade to list the details of the selected VM disk volume.
- On the Overview page screen, check for the Disk State Configuration attribute value.
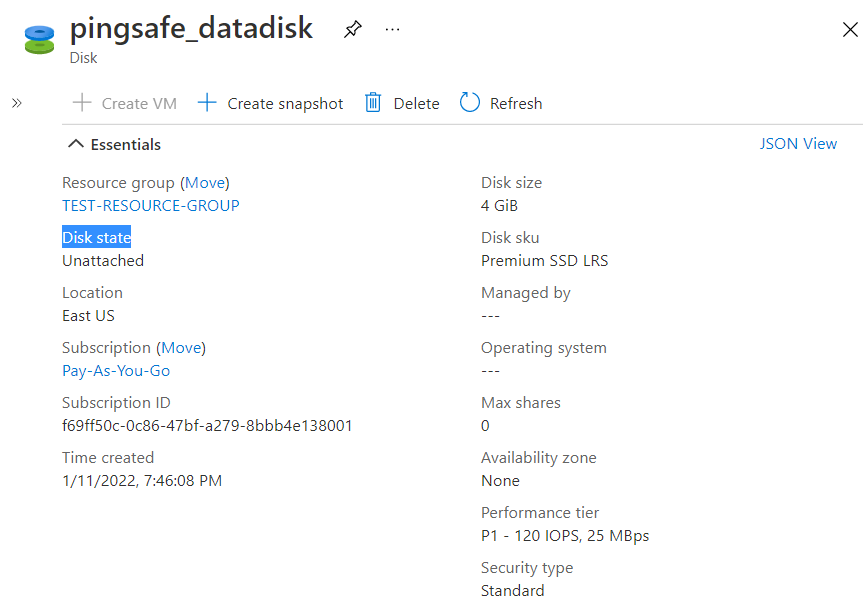
- If the value of the attribute is set to be unattached, then the selected VM disk volume is not attached to any Azure Virtual Machine.
- If that resource is not useful anymore then it can be deleted safely.
- Follow the steps above, for other Azure Virtual Machines (VMs) in the current subscription as well as in other subscriptions in your Azure Cloud.
Steps for Remediation
In order to remove an unattached and not useful Azure Virtual Machine (VM) disk volume from your Azure cloud account, follow the steps given below:
Using Azure Console-
- Firstly, sign in to the Azure Management Console with your registered organization email address.
- Under Azure Services, choose Subscriptions.
- A new Subscription page will be opened up. Choose the subscription for which the issue has to be examined.
- Now, under All Services click on the Disks services.
- A list of all the virtual machines (VMs) disk volumes in your selected subscription will be displayed on the screen.
- Click on the name of the VM disk volume that you want to examine.
- In the navigation panel, choose the Overview blade to list the details of the selected VM disk volume.
- On the Overview page screen, check for the Disk State Configuration attribute value.
- If the value of the attribute is set to be unattached, then the selected VM disk volume is not attached to any Azure Virtual Machine.
- If that resource is not useful anymore then it can be deleted safely. To delete the selected VM disk volume, firstly create a backup of that disk volume.
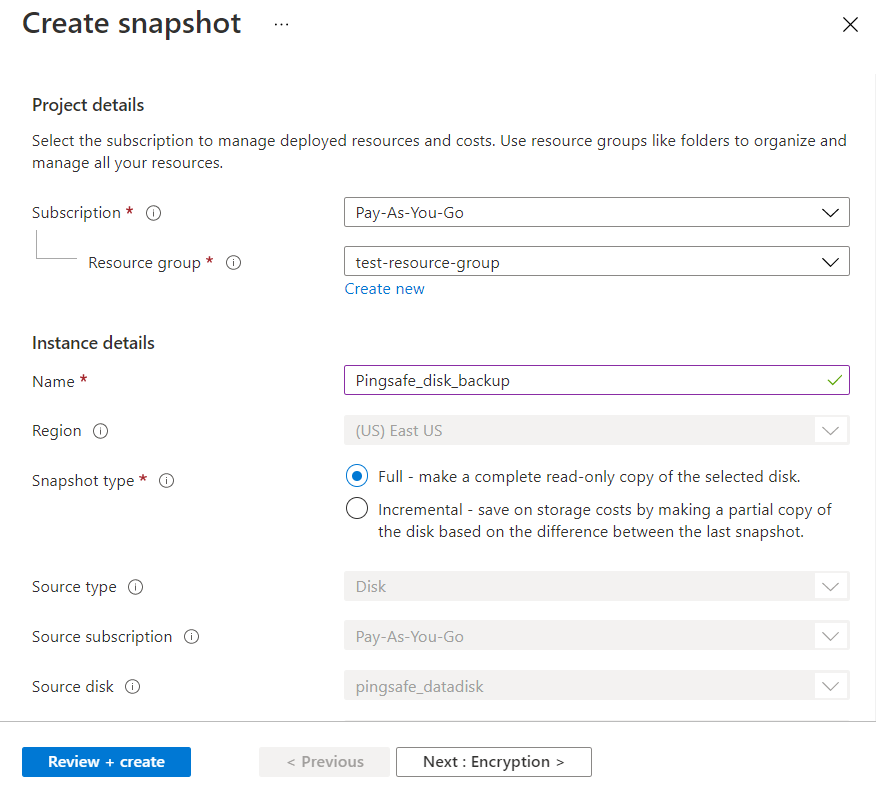
- Click on the Create Snapshot option available at the top navbar in order to initialize the backup process.

- Specify the name for your new snapshot, select the details accordingly, and click on the Review + Create button.
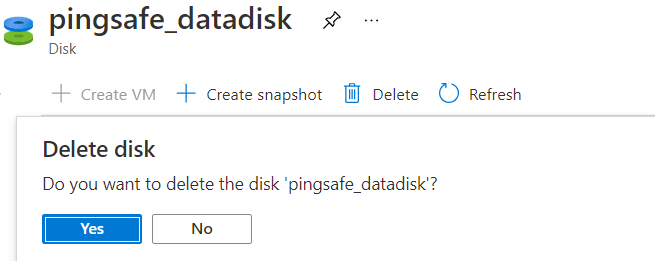
- After the completion of backup creation, click on the Delete option from the top-nav bar.

- Click on the Yes button to confirm your deletion process.
- Follow the steps above, for other Azure Virtual Machines (VMs) in the current subscription as well as in other subscriptions in your Azure Cloud.